 My last post was about a project brought to me by a friend, who wanted to salvage a neat 4-drawer chest from her lab. The unique drawers of this piece - which was custom-made to hold VHS tapes in the 1980s - were saved intact, while the case was destroyed in the move. My task is to re-build the case, re-fit the drawers, and re-face the drawers with the same attractive bamboo plywood I'm to using build the case.
I only take commissions that push my skills, involve new techniques or materials, and promise to be fun. This particular commission was challenging for a few reasons, not least of which was having to build the thing "backwards": fitting a case to existing drawers, rather than building drawers to fit a case. Second, we chose to re-do the chest in bamboo plywood (the old one was melamine-veneered fiberboard), and I've never built furniture with sheet goods before.
In order to get a perfect fit, I chose to cut the case panels over-size, then stack the drawers side-by-side to determine the final width of the piece, then cut the case panels to final size. I don't want to jinx myself, but as of today, my strategy is succeeding.
I couldn't join the case in the same way as the original, which presented real challenges. The original was screwed and stapled together, then veneered in black melamine, hiding the hardware. Since my piece used naked bamboo plywood, all my joints had to be invisible. I decided to use biscuits to join the majority of the parts.
Key to smooth-sliding drawers was a square case and square dividers. I used a speed-square to ensure the dividers were square, and then fixed them in place using brass angle irons and screws. Using the angle irons was a solution I didn't think of until late in the second day; previously, I'd been racking my brain over how to use biscuits to join the dividers to the top and bottom case panels. This is a much better solution than biscuits, which are difficult to place accurately in the middle of a panel.
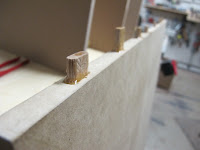
The edges of a panel, however, are easy to join with biscuits, and so I did - using Festool's Domino system. I've found that in spite of the apparent ease of joining with the Domino, it's deceptively difficult to not make careless errors in choosing a reference face, and lining up the mortises: not side by side, which is easy, but on the correct "side" of the edge. This time, luckily, I did everything right, and the case came together relatively easily.
 Given the number of biscuits involved in joining the top, sides, bottom, and back panel with biscuits, I used hide glue so I'd have more time to lay down the glue and place the biscuits.
My strategy - rough fitting, then final fitting - required that I make several dry-assemblies. It was time-consuming, but it guaranteed the case and drawers fit together well. This was critical, since, like many hand-made drawers, these drawers were not square on the face, or along the sides.
 |
| sheet goods are too large for my tab;e saw. the TS75 and track performed well |
Stay tuned for my third (and hopefully final post) on this project, where I'll post photos of the finished piece.
-isaac


No comments:
Post a Comment