Over the past year practicing woodworking, I have completed a few furniture pieces, and explored some of the basic techniques of the craft of furniture making. Apart from making Wine Wings, I have built chests of drawers, tables, bookshelves, and, of course, aquarium stands. Now I have made a video slide show out of the pics I've taken of these pieces.
I could have better pictures, for sure. And I didn't include pictures of the bookshelves I made early on, which we use in our home.
But it's a nice slideshow anyway:
Friday, May 20, 2011


Thursday, May 19, 2011
A dresser rises - phoenix-like - from the scrap heap...

 It's also my first experiment with using water-based dye in furniture. The case is actually a 90 gallon aquarium stand, which I cracked when driving a screw into dry birch. It's strong enough to be a dresser, so I fixed the crack and added some drawer runners inside. The drawers are made from sheets of scrap 1/4" plywood, scrap 3/4" birch & maple, and scrap 3/4" MDF. They're heavy but they work.
About the drawer fronts: from ugly to sexy
 The drawer faces and top are made from scrap curly maple. This lumber was NOT premium by any stretch: the boards were thin, pitted, narrow, and covered with the unsightly "brown hearts" that furniture makers avoid. Because of the brown hearts, I knew I would need to color the drawer fronts and top somehow, and I didn't want to use stain, which dulls curly maple.
 Because the boards were so narrow, I wouldn't be able to use a single board for each drawer. And because the "curls" were so spotty, it would be impossible to make two boards look like a single board. To get around these visual problems, I decided to form a "V" shaped panel, with each board angling toward the center line at 45 degrees.
Once I had made my V shaped panels, it was a natural choice to use red and burgundy dye to bring out the wavy figure of the curly maple, and bring a bit of visual consistency to the mish-mash of light and dark grain.
I sized the drawer fronts so each drawer was taller than the next by a ratio of 1:1.618 - the golden ratio. Then I cut the drawer front panel into three strips of the appropriate size.
The handles: routed from a scrap VG Fir 2x4
 I like using VG fir for the moldings on large aquarium stands. Hence, I have some scraps of VG Fir 2x4. VG Fir is knot-free and easily milled, and well cured, unlike fir studs. to size the handles, I divided the width of the dresser by 10 to get a length for the small handle of 4.8 inches. Then, I multiplied the length of the small handle by the golden ratio, to get the length of the middle handle, and again for the large handle.
 The drawer slides
 I used Rockler's less expensive medium duty drawer slides. If I were to do it again, I would use the heavy duty slides, or, even better, use the medium duty slide from Accuride, which is more robust and slides straighter.
The Feet
I was able to use pieces of 3/4" maple as short as 5" to make the feet.
The finish
I finished the dyed maple parts with shellac, then polyurethane. The case was finished with black water-borne stain and water-based lacquer (It was an aquarium stand, remember?).
The Verdict:
 |
| Some drawer parts were badly scarred scrap |
Tuesday, May 17, 2011
Great Video showing picture frame clamping setup on the bench
I like this technique! If you have a workbench with dog holes, it's possible to set up this clamping system right on the bench top. These kinds of clamps are great for general work holding on the bench.
Saturday, May 14, 2011
DIY sanding block & Klingspor Sand Paper for Sand Flee

For sanding of profiles, such as molding and flutes, a shop-made sanding block is the only way to get into tight curves and corners.
This post is about how to make sanding blocks for any purpose. It includes tips from my experience on how to outfit a sanding block for perfect results that are nearly fool proof.
Using Dye in Furniture Design
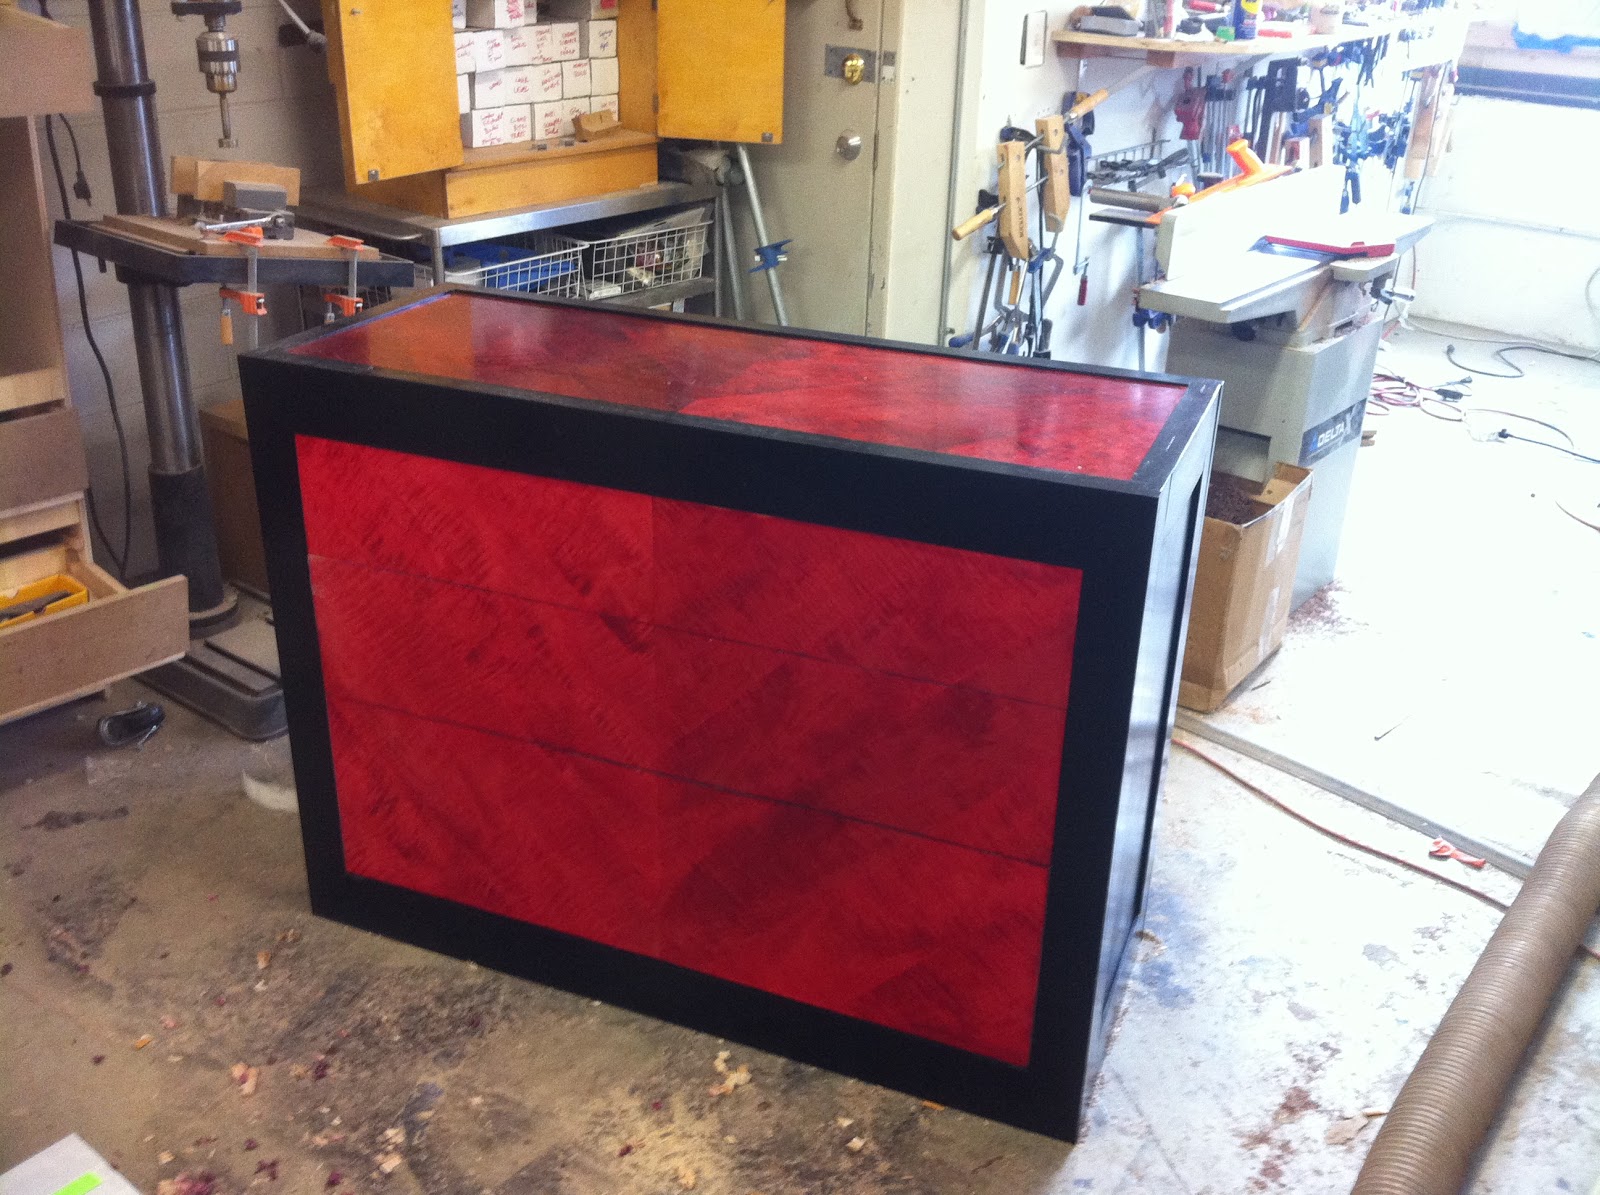 |
| A dyed chest. All it needs are feet and drawer pulls and I'm done! |
I still don't use stains, but I've changed my mind about dyes. Unlike stains, dyes penetrate the wood fibers rather than pack the pores with pigment. Dyes highlight the natural figure and chatoyancy in wood, and range in color from subtle browns and yellows, to intense reds, blues, and greens. Dyes are often used with highly figured, light-colored woods, most notably curly maple.
Monday, May 9, 2011
Decware Zen Open Baffle Project

The Zen Open Baffle is the highly-touted open baffle design that Decware founder Steve Deckert claims produces percussive, deep bass down to 50 Hz. It achieves this bass response by way of a network of two resonant chambers and a horn, incorporated behind the baffle. This network amplifies the rear-firing energy form the Zen's single full-range driver, and can be adjusted for bass response by opening or closing a valve a the top of the chamber, underneath the back of the driver.
Tuesday, May 3, 2011
Minwax Polyshades vs. Water-Based Black Stain Comparison

I have long preferred water-based black stain for getting my furniture black, for a few reasons.
- First, I like the water-based cleanup process (just rinse with water).
- Second, I have always had problems with oil-based black stains, especially if I'm brushing them on, because oil based stains have a tendency to stick to the brush, and it's easy to remove stain from the work while trying to put it on. This is a problem peculiar to black stain, because with black stain, the goal is usually a completely black finish, whereas with other stains the goal is merely to tint the wood, or bring out the grain.
- Third, water-based finishes, including stains, dry much faster than oil-based finishes, and they tend to flow out more evenly, leaving a uniform finish on the work.
Saturday, April 30, 2011
Festool TS 75 plunge cut circular saw review

And here the TS 75 performs as well as I could ask. I have used the TS 75 to melt through sheet goods. I used it to size my bench top, which was made from two layers of 3/4" MDF, one layer of 3/4" plywood, and 1/4" of hardboard. That's 2 1/2" of dense material. But the TS 75, with it riving knife backing up the blade, made short work of it, with blade capacity to spare.
Festool Rotex Sander Review

Wednesday, April 20, 2011
the perfect gift

A friend of mine - Vicco Von Voss - is a master furniture maker and timber framer. He works out of a studio on the Eastern Shore of Maryland, where he gets much of his lumber stock from fallen trees on his property and that of neighbors. Vicco's projects can be quite large, and he uses premium lumber. As a result, his scrap lumber is like manna from heaven to a guy like me. So when he brought up a truckload of lumber from his personal stockpile, I was overjoyed.
 Among the treasures were a walnut crotch, a dozen large pieces of walnut veneer, cherry veneer, and eight walnut boards from a flitch he milled himself. All of the lumber was air dried on his property. To learn more about Vicco and his work, visit his website at http://www.viccovonvoss.com/
Thanks Vicco!
Thursday, April 14, 2011
Review of 3 Drills: Ridgid Fuego, DeWalt DC720, and Festool 15+3
 |
| My fav: The Festool 15+3 |
Ridgid Fuego: Small drill claims 250 inch-pounds of max torque. Chuck has fairly significant run-out, which is only an issue where precise drilling is necessary. But a slew of broken bits may have something to do with the run-out. List price: $100. Used: $50
DeWalt DC 720: larger drill claims over 1,000 inch-pounds of torque, but feels and acts as powerful as the Festool 15+3, which claims 350 inch-pounds of torque. One of the two batteries stopped working only a month after purchase. No battery guarantee. Never got it replaced. List Price: $200. Used: $50
Festool 15+3: larger drill has three chucks, allowing it to act as a right-angle driver. Also comes with depth-stop chuck for precise drilling. No run-out at all, for perfectly sized holes and no broken bits. My experience with Festool's impeccable service gives me confidence I won't be left with a hunk of junk should something break. My experience with Festool tells me breakage is unlikely. List price: $460. Used Price: $360.
Verdict: The Festool 15+3 goes anywhere the Fuego can, but is more powerful and more accurate. At a price of $360-$460 it's far more expensive than the others. But throw in the price of a right angle driver to augment the DeWalt and Ridgid's capabilities, and the price doesn't look so bad. Throw in the price of poorly-made holes and broken bits, and the Festool starts to look pretty competitive. Add in the fact that Festool won't let you go more than a few days without a working tool, and Festool distributors are local stores with great service, and I think the 15+3 is the best overall value.
"Fish" stand now on sale at Skipton's

Frame and Panel Case Tips: Rattle-Free Panels

- The grooves in the frame parts (rails and stiles) should be centered on the edge of the frame parts, and at least 1/4" from the edge.
- The depth of the frame grooves should be no deeper than the distance of the groove from the edges of the frame part. This ensures the frame is strong enough stand up to use and abuse.
- The tongues of the panel should not reach all the way to the bottoms of the grooves in the frame parts. This allows for side-to-side expansion of the panel and the frame. If the panel DOES touch the bottoms of the grooves, any expansion of the parts will result in warping of the assembly.
- If using a solid-wood panel, the grooves in the frame should be slightly wider than the tongue on the panel. This lets the panel get thicker (due to seasonal movement), without splitting the frame parts.
- Don't glue the panel into the frame!
Monday, April 11, 2011
My bosch 1617 Router Review

Why I bought it in the first place:
I bought the Bosch 1617 combo package from my local Rockler store for a few good reasons: first, it's a 2.25 HP router, which is fairly powerful for a general purpose router. Second, the combo package comes with both a fixed base (for use in a router table) and a plunge base (for use in hand-held applications). Third, the 1617 is priced very well: i still can't find a 2.25 HP router with both types of base for the price of the 1617 combo pack: around $230. The 1617 came with wrenches, and two collets: a 1/4" and a 1/2".
Sunday, April 10, 2011
Eden's Bird House
 My daughter has started taking a wood shop class at the Eliot School for Fine Arts in Jamaica Plain, MA. Of course she likes wood shop, 'cuz she loves her daddy :)
But the real reason she's taking the class is because I am training under the teacher Mario Rubio, so that I can start teaching wood shop to kids at the Eliot School nine weeks from now. We had a great time at the first class session, and Mario is an excellent teacher. But Eden and I decided to do a little practicing on our own this weekend, so on Saturday we fired up the studio and got to work on a bird house.


First we marked out our plywood for the walls, roof, and floor of the bird house. This was also when Eden made the preliminary sketches for the exterior, which she plans to paint later. She's a natural! Now, our bird house is ready to go, except for some dowels for the birds to sit on (their front porch, as it were), and putting on the roof, which we have left off so that Eden can install some bird furniture later.
My best work so far. Thanks Eden!
Friday, April 8, 2011
The best gap filler - my DIY solution
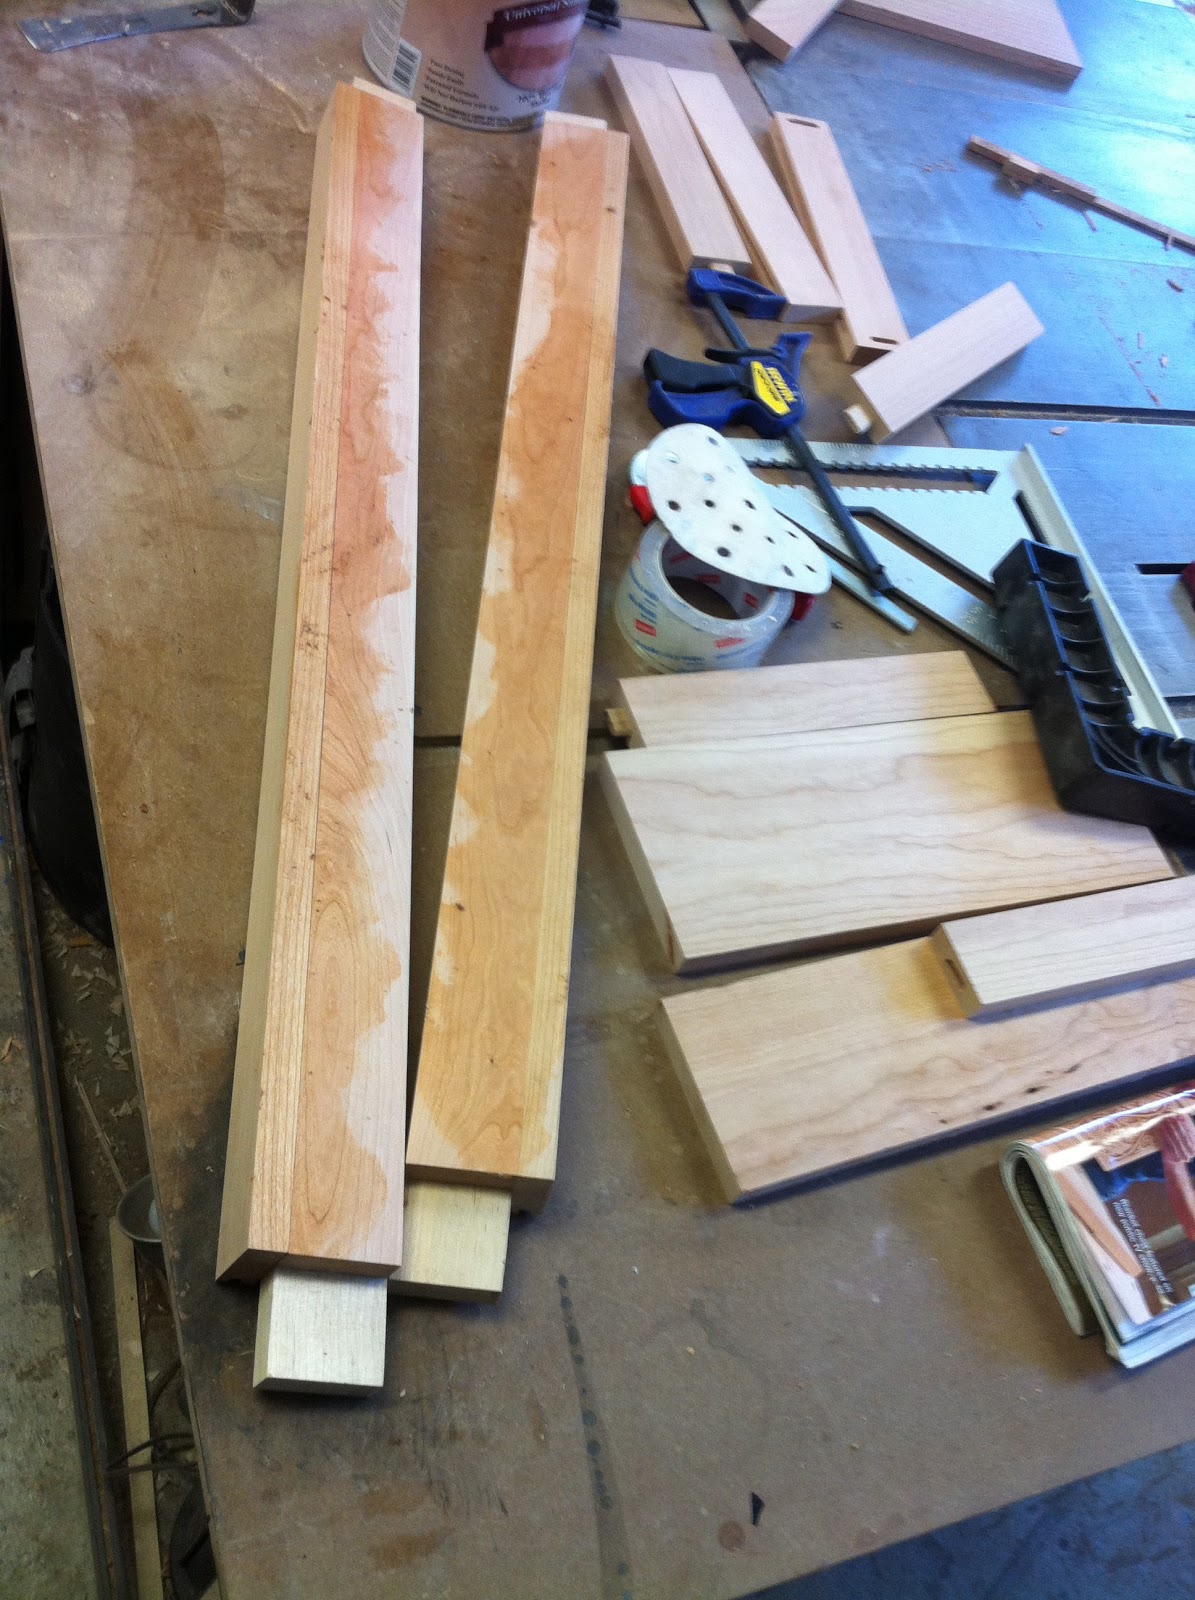
 Filling gaps is a regular part of making furniture. there are the inevitable gaps between joints, and sometimes even open knots or holes in an otherwise great piece of wood. What do we use to fill these gaps? There are gap fillers on the market, but I don't know what's in them. They come in a variety of colors, and I've used them a lot. But I don't want to buy a can of filler every time I need to fill a gap in a joint, and besides, the colors they come in are only approximate - they don't necessarily match the wood I'm using.
So today, when I needed to fill some gaps in a cherry cabinet I'm making, I decided to make my own filler. The process is easy, and similar in principle to filling pores in wood grain:
 |
| slurry on pad |
 | |
| my dust source |
 | |
| mixing the dust and shellac |
 | |
| de-waxed shellac is a must |
 | |
| the line is darker at first |
 | |
| the line has almost disappeared |
 | |
| once the varnish is on, the line disappears |
Thursday, April 7, 2011
My first raised panels


Raised panels: most people don't think much about them, and many perhaps never noticed that some cabinet doors have them and some don't. What's a raised panel? Well, first I should say that many cabinet doors are made in a "frame and panel" fashion, where four narrow frame members form the outside edges of a rectangle, and hold between them a panel that's more or less flat. The panel is secured within the frame by means of a groove that runs around the inside edges of each frame member; a "tongue" around the outside edge of the panel slips into this groove.
The Shakers, whose design aesthetic is still popular today, preferred to use flat panels: panels that appeared to be the same thickness throughout, and therefore were flat-faced. Their reason? The Shakers eschewed any frilly design elements that served no function. Thankfully, flat panels are easily made from flat pieces of plywood, making it easy to design and build shaker-style frame-and-panel cabinets with inexpensive materials.
90 Gallon "Tall" stand now on sale at Skipton's
 My most recent 90 gallon aquarium stand is now on sale at Skipton Unique Aquaria and Reptiles. The stand is a big improvement over my last 90 gallon stand: I used 1/2" plywood panels this time, rather than 1/4" panels, and I made a removable center "light block bar". The light block bar allows me to build the stand with regular overlay doors and block any gaps between the doors (so you can't see what's in the cabinet), but then get full-width access to the cabinet when you need to add or remove a big sump.
 I also improved my finishing technique with this stand. I used water-based black stain first (way better coverage than oil-based black), then sprayed on two coats of clear polycrylic, dyed black with Trans-Tint water-soluble black dye. I have nearly perfected my air pressure/fluid tip/ air cap settings to spray this water-borne finish smoothly and without flaws.
 |
| ...and now you don't! |
 |
| now you see the center bar... |
Nano aquarium pedestal stand in cherry
I am making a pedestal stand for a "nano" aquarium - a tank only 11" cubed. I'm using some really nice cherry for this stand, which I expect will go into a nice home on Beacon Hill somewhere ;-)


Tuesday, April 5, 2011
Mahogany and Bamboo Stand now on Sale at Skipton's

The black trim on standard tanks doesn't match the mahogany very well, so I am looking into a way to "skin" standard tanks with hardwood trim, to match any stand or home decor.
Subscribe to:
Posts (Atom)