Over the past year practicing woodworking, I have completed a few furniture pieces, and explored some of the basic techniques of the craft of furniture making. Apart from making Wine Wings, I have built chests of drawers, tables, bookshelves, and, of course, aquarium stands. Now I have made a video slide show out of the pics I've taken of these pieces.
I could have better pictures, for sure. And I didn't include pictures of the bookshelves I made early on, which we use in our home.
But it's a nice slideshow anyway:
Friday, May 20, 2011
Thursday, May 19, 2011
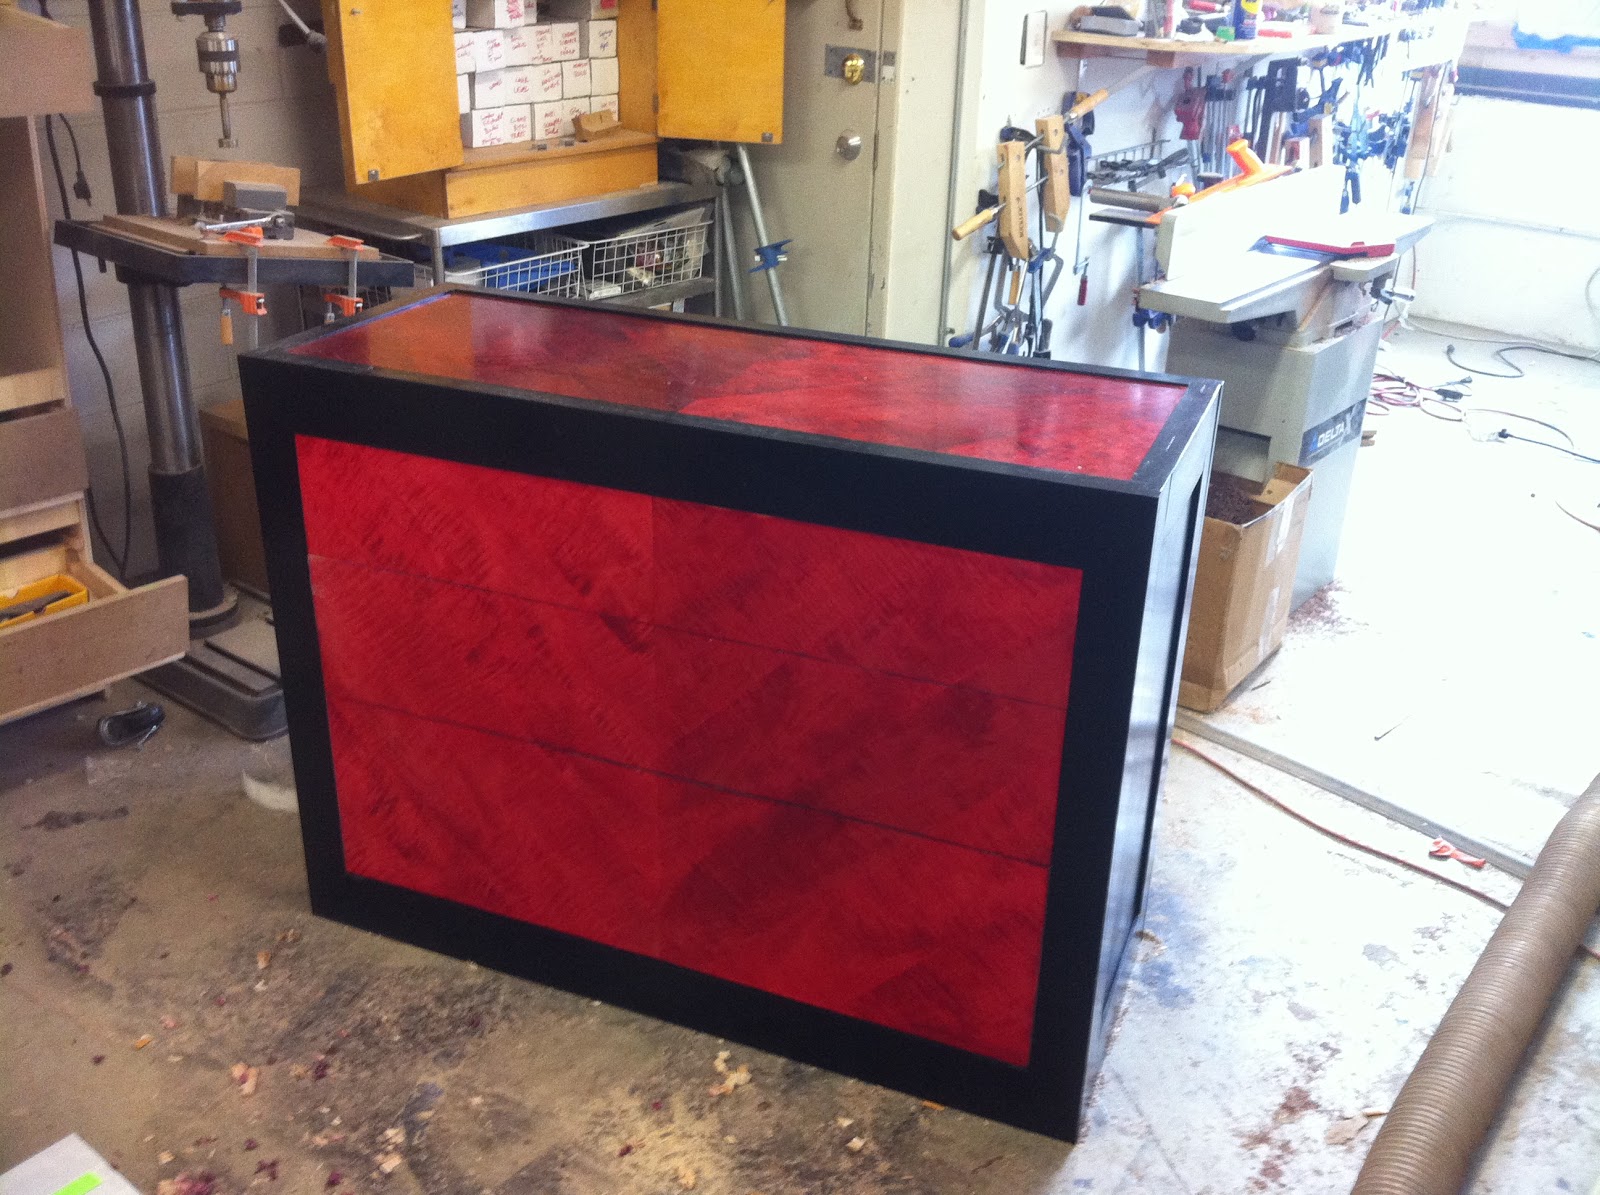
A dresser rises - phoenix-like - from the scrap heap...

 It's also my first experiment with using water-based dye in furniture. The case is actually a 90 gallon aquarium stand, which I cracked when driving a screw into dry birch. It's strong enough to be a dresser, so I fixed the crack and added some drawer runners inside. The drawers are made from sheets of scrap 1/4" plywood, scrap 3/4" birch & maple, and scrap 3/4" MDF. They're heavy but they work.
About the drawer fronts: from ugly to sexy
 The drawer faces and top are made from scrap curly maple. This lumber was NOT premium by any stretch: the boards were thin, pitted, narrow, and covered with the unsightly "brown hearts" that furniture makers avoid. Because of the brown hearts, I knew I would need to color the drawer fronts and top somehow, and I didn't want to use stain, which dulls curly maple.
 Because the boards were so narrow, I wouldn't be able to use a single board for each drawer. And because the "curls" were so spotty, it would be impossible to make two boards look like a single board. To get around these visual problems, I decided to form a "V" shaped panel, with each board angling toward the center line at 45 degrees.
Once I had made my V shaped panels, it was a natural choice to use red and burgundy dye to bring out the wavy figure of the curly maple, and bring a bit of visual consistency to the mish-mash of light and dark grain.
I sized the drawer fronts so each drawer was taller than the next by a ratio of 1:1.618 - the golden ratio. Then I cut the drawer front panel into three strips of the appropriate size.
The handles: routed from a scrap VG Fir 2x4
 I like using VG fir for the moldings on large aquarium stands. Hence, I have some scraps of VG Fir 2x4. VG Fir is knot-free and easily milled, and well cured, unlike fir studs. to size the handles, I divided the width of the dresser by 10 to get a length for the small handle of 4.8 inches. Then, I multiplied the length of the small handle by the golden ratio, to get the length of the middle handle, and again for the large handle.
 The drawer slides
 I used Rockler's less expensive medium duty drawer slides. If I were to do it again, I would use the heavy duty slides, or, even better, use the medium duty slide from Accuride, which is more robust and slides straighter.
The Feet
I was able to use pieces of 3/4" maple as short as 5" to make the feet.
The finish
I finished the dyed maple parts with shellac, then polyurethane. The case was finished with black water-borne stain and water-based lacquer (It was an aquarium stand, remember?).
The Verdict:
 |
| Some drawer parts were badly scarred scrap |
Tuesday, May 17, 2011
Great Video showing picture frame clamping setup on the bench
I like this technique! If you have a workbench with dog holes, it's possible to set up this clamping system right on the bench top. These kinds of clamps are great for general work holding on the bench.
Saturday, May 14, 2011
DIY sanding block & Klingspor Sand Paper for Sand Flee

For sanding of profiles, such as molding and flutes, a shop-made sanding block is the only way to get into tight curves and corners.
This post is about how to make sanding blocks for any purpose. It includes tips from my experience on how to outfit a sanding block for perfect results that are nearly fool proof.
Using Dye in Furniture Design
 |
| A dyed chest. All it needs are feet and drawer pulls and I'm done! |
I still don't use stains, but I've changed my mind about dyes. Unlike stains, dyes penetrate the wood fibers rather than pack the pores with pigment. Dyes highlight the natural figure and chatoyancy in wood, and range in color from subtle browns and yellows, to intense reds, blues, and greens. Dyes are often used with highly figured, light-colored woods, most notably curly maple.
Monday, May 9, 2011
Decware Zen Open Baffle Project
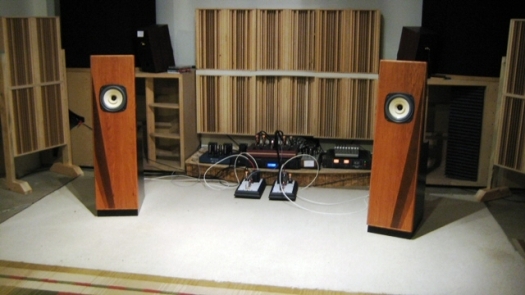
The Zen Open Baffle is the highly-touted open baffle design that Decware founder Steve Deckert claims produces percussive, deep bass down to 50 Hz. It achieves this bass response by way of a network of two resonant chambers and a horn, incorporated behind the baffle. This network amplifies the rear-firing energy form the Zen's single full-range driver, and can be adjusted for bass response by opening or closing a valve a the top of the chamber, underneath the back of the driver.
Tuesday, May 3, 2011
Minwax Polyshades vs. Water-Based Black Stain Comparison

I have long preferred water-based black stain for getting my furniture black, for a few reasons.
- First, I like the water-based cleanup process (just rinse with water).
- Second, I have always had problems with oil-based black stains, especially if I'm brushing them on, because oil based stains have a tendency to stick to the brush, and it's easy to remove stain from the work while trying to put it on. This is a problem peculiar to black stain, because with black stain, the goal is usually a completely black finish, whereas with other stains the goal is merely to tint the wood, or bring out the grain.
- Third, water-based finishes, including stains, dry much faster than oil-based finishes, and they tend to flow out more evenly, leaving a uniform finish on the work.
Subscribe to:
Posts (Atom)